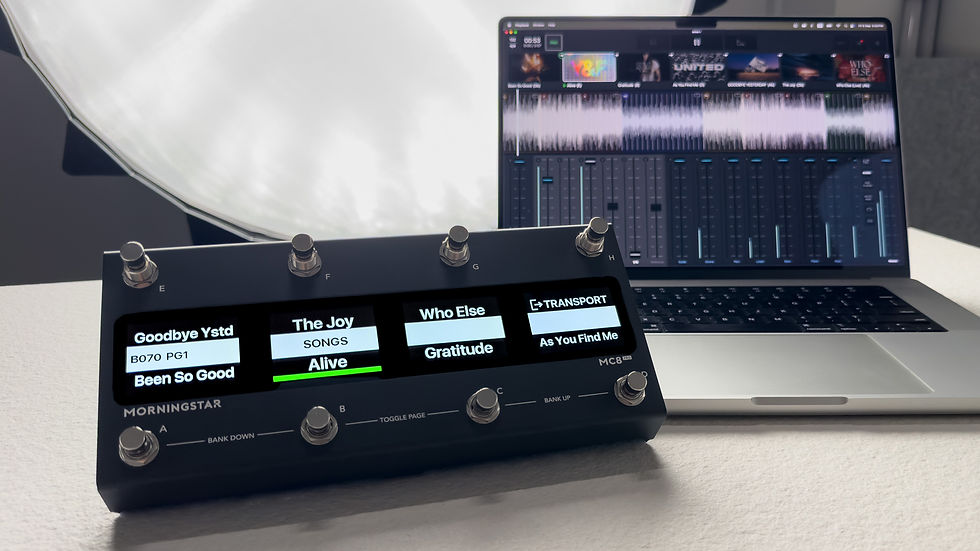
Strymon Timeline & MC6 Midi Controller
- James

- Jul 22, 2018
- 5 min read
This marks the start of our tutorial series, where we go in-depth into the MIDI capabilities of popular guitar pedals and how to use it with the MC6 Midi Controller.
In this series, we will be exploring how to set up the Strymon Timeline for use with the MC6 MKII Midi Controller.

Strymon Timeline MIDI features
MIDI I/O
The Timeline is fitted with a Midi In and Midi Out. The Timeline does generate some Midi messages of its own. The Midi Out is also used to pass incoming messages through.
MIDI Settings
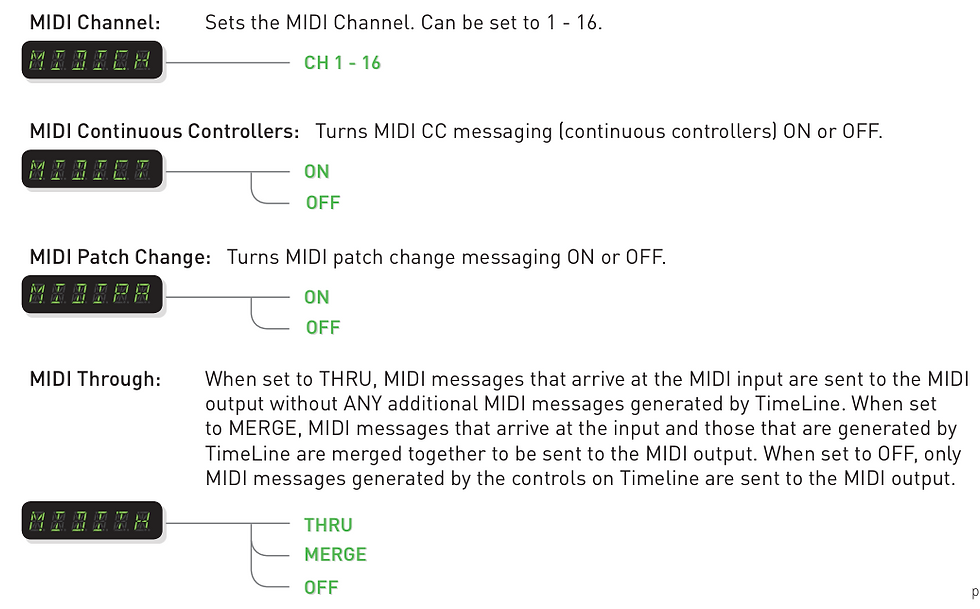
The Midi settings can be found in the Global menu. There are 4 Midi settings in this menu, namely Midi Channel, Midi Continuous Controllers, Midi Patch Change and Midi Through.
1. MIDI Channel - Sets the Timeline Midi Channel so that the device only responds to Midi messages sent on that channel
2. MIDI Continuous Controller: Turns the ability to read Midi CC messages on the Timeline On and Off
3. MIDI Patch Change: Turns the ability to read Midi PC messages on the Timeline On and Off
4. MIDI Through: There are 3 options here: Thru, Merge and Off. When set to Off, only Midi messages generated by the Timeline are sent. When set to Thru, only incoming Midi messages will be sent out. When set to Merge, both incoming Midi messages and those generated by the Timeline will be sent.
For this tutorial, I will set my Timeline to MIDI channel 1. My MIDI Continuous Controller and Patch Change settings are set to ON, while my MIDI Through settings is set to Thru.
MIDI Clock
If you want to use the Midi Clock function on the Timeline, be sure to go into the Parameter settings by pushing the value encoder and the turn turning the value knob until you see "MIDICL". Push the encoder again to edit the parameter for this setting. When Midi Clock is set to ON, the Timeline will respond to an external Midi clock from the Midi Input. Please take note that this setting is on a Preset level, and hence only presets with this parameter set to ON will respond to Midi Clock messages.

MIDI Implementation
The Strymon Timeline Midi implementation chart can be found on page 25 in their manual. The Timeline manual can be found here.
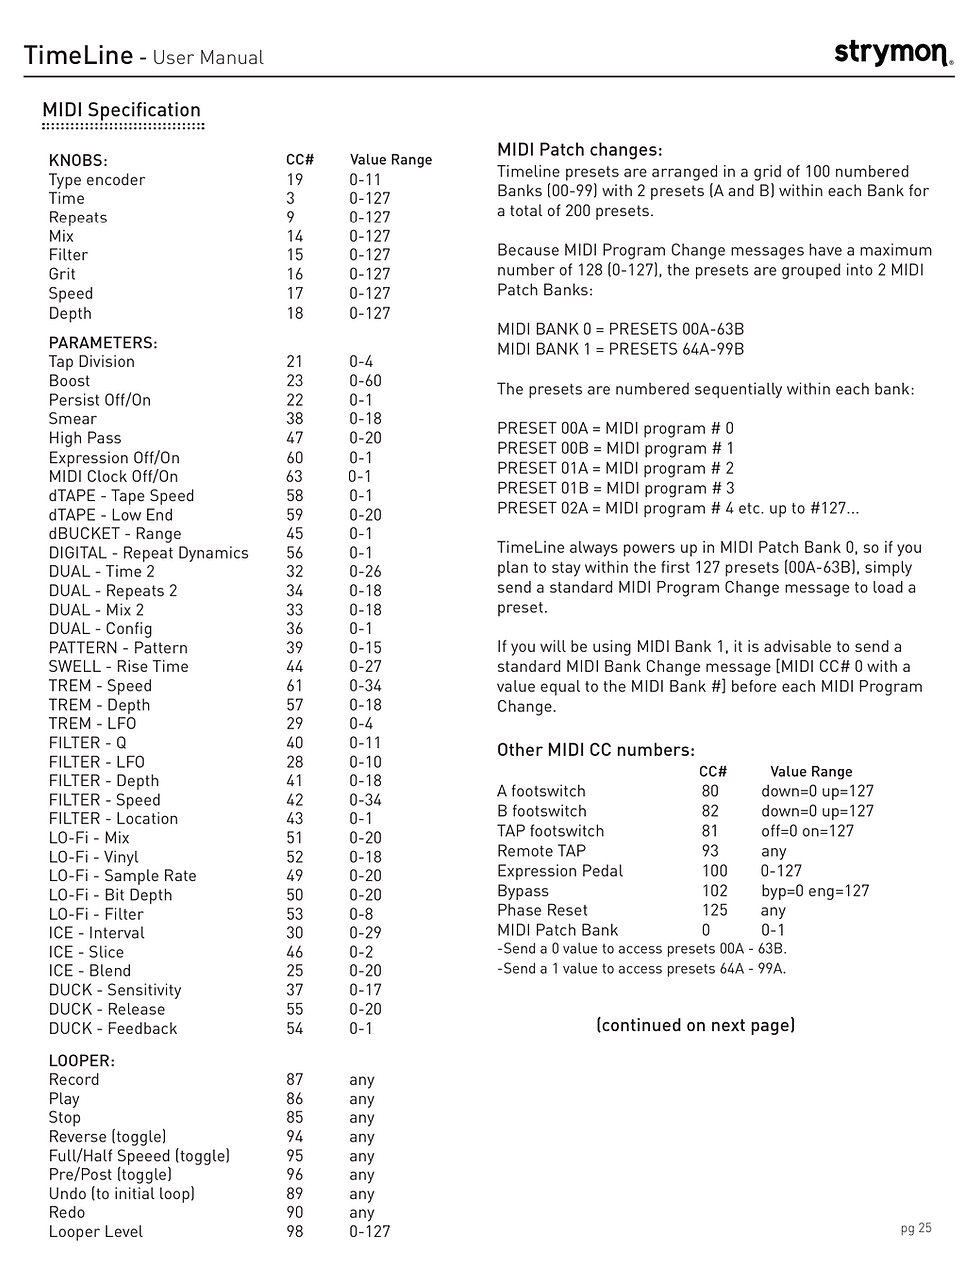
Let's dissect each portion of the MIDI Specification chart.
MIDI Specifications
On the left side of the chart is the specifications for MIDI CC controls. Each CC# controls a function as specified on the chart. For example, sending a CC#19 message will control the "Type encoder", which essentially selects the delay type on the Timeline. The delay type being selected depends on the CC value that is sent. In the chart, it states that it accepts a CC Value of 0-11. Hence, we can infer that sending a CC#19 with value 0 will select a certain delay type, while a value 1 will select a different delay type.
Looking at another example, a CC#87 message will control the Record function. Under "Value Range", the chart states "any", which means that it accepts any value. The Timeline will not depend on the CC Value, but as long as a CC#87 message is received, the Record function will be activated.
MIDI Patch Changes
On the right side of the chart shows the MIDI Patch changes, where sending MIDI PC messages will change the presets on the Timeline. Sending a PC#0 message will engage Preset 00A, and a PC#1 message will engage Preset 00B.
Do note that if the Timeline is in bypass mode, sending a PC message will set the preset, but will not engage the Timeline. You'll need to send a CC#102 with value 127 message to engage it.
Other MIDI CC numbers
The Timeline also allows control of its hardware functions such as mimicking the stepping of A or B footswitch, or the TAP footswitch. Sending a CC#80 with value 0 message will simulate the pressing down of the A footswitch. Be sure to send a CC#80 with value 127 message to simulate the release of the footswitch. Other control such as Remote TAP, Expression Pedal and Bypass are also available for control via CC messages.
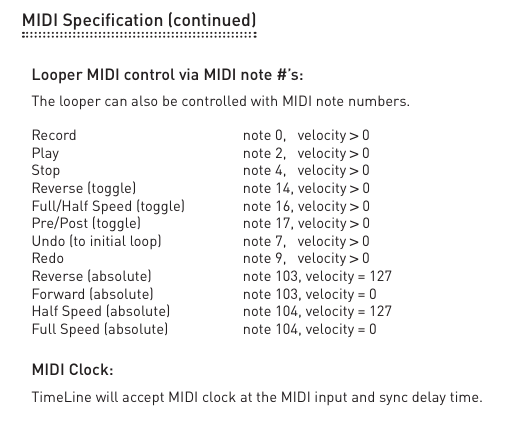
Looper MIDI control via MIDI note #'s
The Timeline can also be controlled by MIDI Note messages. These are a different MIDI type from the CC messages which has a Note Number and Velocity parameter. We'll ignore this portion as we can control the same functions with CC messages.
Using the MC6 MKII with the Timeline
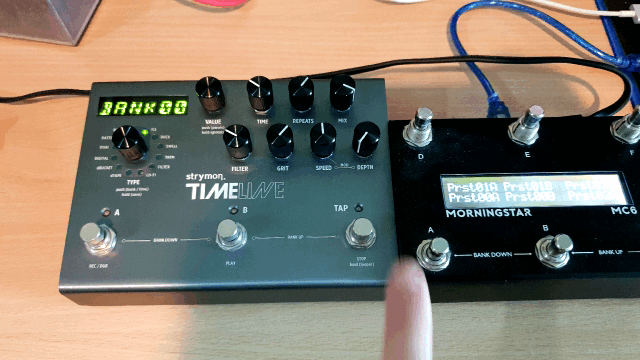
Now that we are clear with what the TImeline MIDI is capable of, let's try to program a couple of banks on the MC6 to control the Timeline.
Bank 1: Engage different presets on the Timeline with Bypass option
For presets A-F on the MC6, I'll be sending PC#0 to PC#5 messages to call different presets on the Timeline. I'll also be adding a CC#102 with value 127 message on each MC6 preset to engage the Timeline. This will be done on the PRESS action. I'll also add a CC#102 with value 0 message on a LONG PRESS action so that I have an option to bypass the Timeline.

This setting will be then replicated to the other 5 presets, each with a different PC number.
This simple setup gives me a great deal of control, where pressing each switch will engage a different preset. If I want to bypass the Timeline, I can just hold down any switch to bypass the unit
Bank 2: Control Looper functions on the Timeline
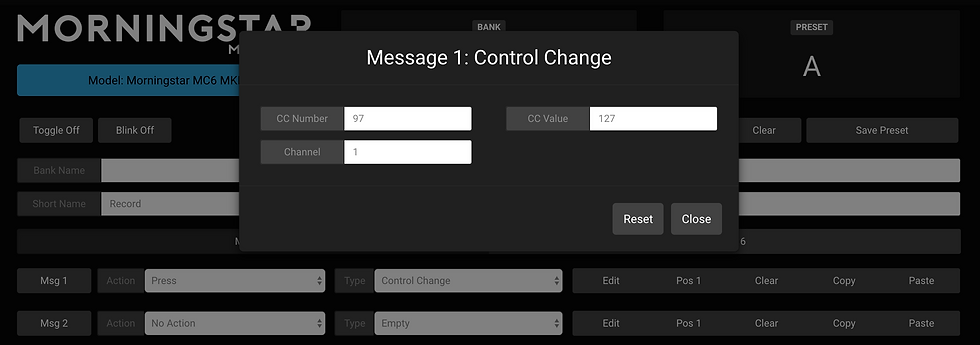
Creating a bank that controls the Looper can easily be done with 2 Presets. For my Preset A on Bank 2, I'll use it to trigger the Record function with the settings below:
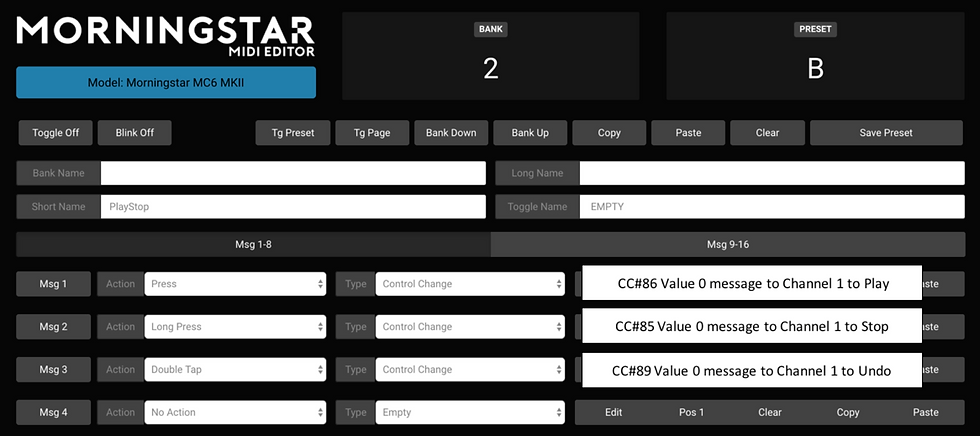
For Preset B, I'll use the switch to control the Play and Stop function on PRESS and LONG PRESS, as well as the Undo function on DOUBLE TAP. This would give me control over 3 functions with just one switch.
For Preset C, I would like to have some control over the Looper volume level. CC#98 controls the Looper volume on the Timeline, where the volume depends on a CC value of 0 (Low) to 127 (High). Over here, I have set up a toggle function to toggle between 2 CC#98 messages with a value of 100 and 127 for a low and high volume. Notice that I have the Toggle selection set to "Toggle On", which would mean that the preset will toggle each time it is engaged. For the second message, I have the position set to "Pos 2" so that it only engages when the preset is toggled.
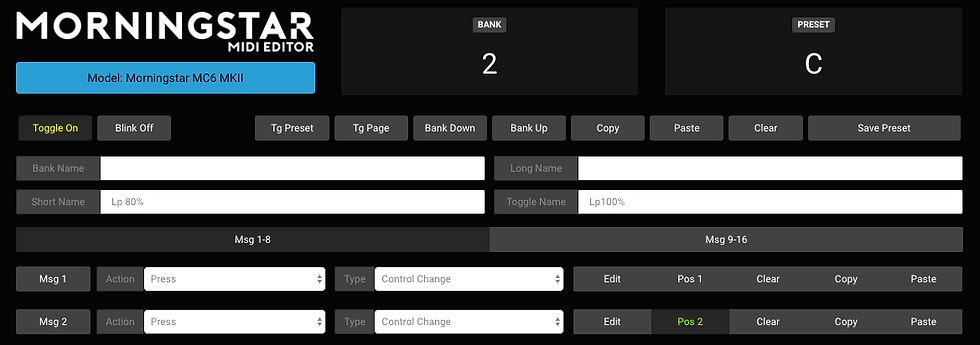

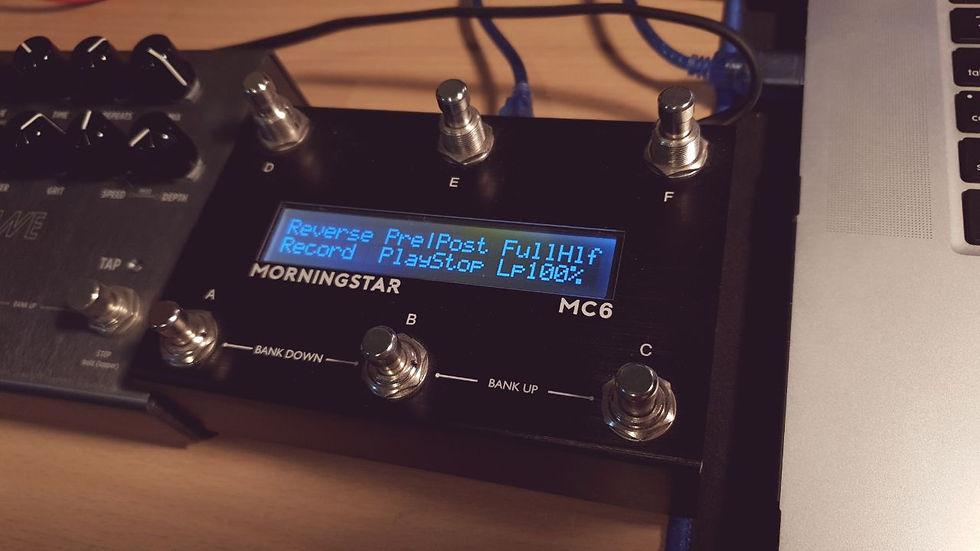
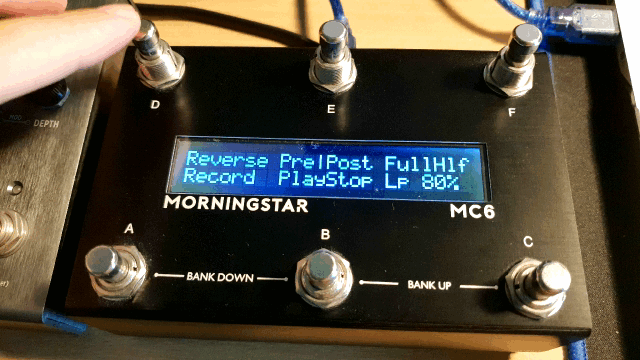
I have the Short name set to "Lp 80%" and Toggle Name set to "Lp100%" so my preset name will change depending on the toggle position of the preset.
I still have Presets D, E and F to use, and not to mention Presets G-L on the other page. I can use this to control other Looper functions like Reverse, Full/Half and Pre/Post. The steps would be the same. One thing I would like for my Looper bank is a "Looper Mode" message, which toggles the MC6 in and out of Looper mode. Looper mode reduces the delay when the switches are read, such that each switch press becomes ultra sensitive. This is essential when controlling time sensitive functions like Record and Play. I can easily add it as a second message to my Preset A (controlling the Record function) and map it to a DOUBLE TAP action.
That is all we have in this article. I hope you enjoyed it and we are looking forward to writing the next one. If you have any comments and/or feedback, including device you would like us to review (we'll do our best!) or additional features you would like us to write about, please do not hesitate to drop us an email!
Next week, we'll look into how to set up an active preset bank on the MC6, where only the selected preset will be blinking to indicate that it is active.
Keep making awesome music!
The Morningstar Engineering Team

